Studio scenes: how to stitch one video from many scenes
Studio scenes is a tab in the Video avatars section where a video is built like an edit: you add several whole scenes — a talking avatar, an image or a ready-made clip — arrange them and set the shared parameters, and the section stitches them into a single video file. It is the right pick when you need a complete video rather than a short clip from one photo: the avatar presents the product, images show the details, and clips add motion. Below: what the scenes are, what to set before launch, how to build the video step by step and what it costs. The tool opens in the Studio scenes tab.
What Studio scenes is
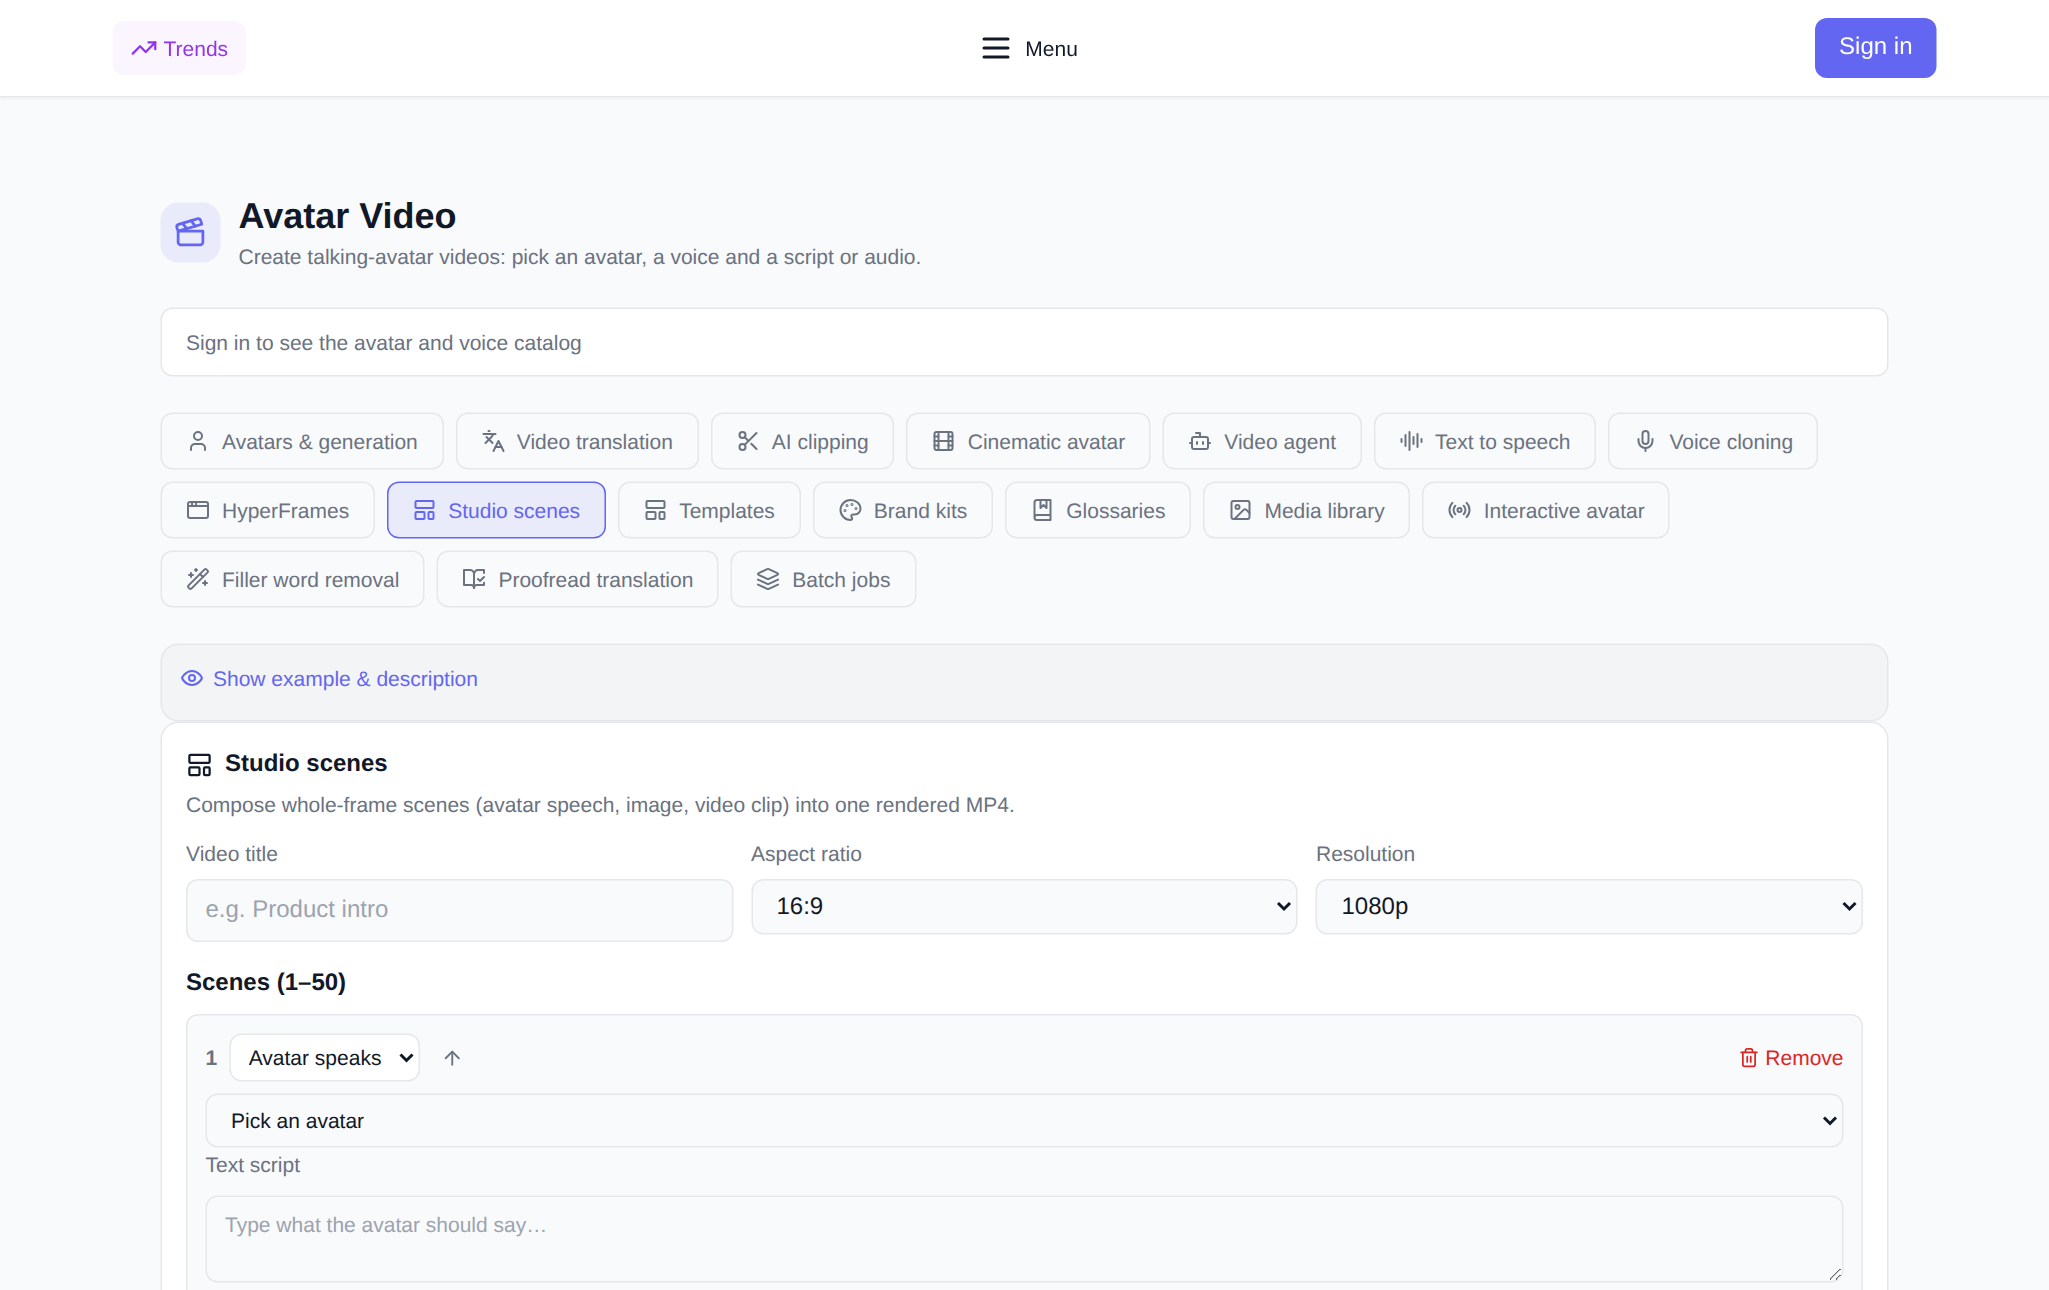
Studio scenes is a builder that assembles a video from separate, complete frames. Each scene is a self-contained piece of the finished video: a talking avatar with speech or uploaded audio, an image with a voiceover or a silent pause, or a ready clip. You arrange the scenes in order, pick the shared resolution and aspect ratio, and get one MP4 where the fragments follow one another. No editing in an external app: stitching the frames, voiceovers and transitions is handled by the section.
What a video is made of
- Talking avatar. Pick an avatar from the catalog, enter a script of up to 5,000 characters or attach a ready audio recording, choose a voice — you can preview it before launch — and optionally set a motion prompt for photo avatars.
- Image. Upload a picture or paste a link. The scene can be voiced with text or audio, or left silent: then you set how many seconds it stays on screen.
- Clip. Paste a link to a ready video fragment and, if needed, add a voiceover or text to it.
A single video can hold from one to fifty scenes. The order changes with one button and extra scenes are removed — build exactly the script you need.
What to set before launch
- Video title — the caption your composition appears under in the history.
- Aspect ratio: 16:9 for YouTube, 9:16 for Shorts, Reels and TikTok, 1:1 for feeds, plus 4:5, 5:4 and automatic.
- Resolution: 720p, 1080p or 4K.
- Scene order and line-up — move scenes up and delete the ones you do not need.
How to build the video: step by step
- Open the Studio scenes tab in the Video avatars section and sign in.
- Set the title, aspect ratio and resolution.
- Build the first scene: choose its type — talking avatar, image or clip — and fill in the fields. For an avatar scene pick the avatar and voice and enter the script or attach audio; for an image upload the file or paste a link; for a clip paste the video URL.
- Add the remaining scenes with the “Add scene” button and put them in the right order.
- Check the price in tokens: it is shown before launch.
- Press “Compose video”. The clip appears in the “My studio videos” block with a waiting status and updates itself.
- Once it is ready, the video plays right in the card and downloads with one button.
What a composition costs
Billing is in tokens, with no subscription: new users receive starter tokens at sign-up, and the balance is then topped up by any amount. The price is visible before launch and is made of the paid parts: talking-avatar scenes are billed per second, and voiceovers for text scenes by speech length; silent images and clips are not charged separately. What you see in the interface is what is charged. If the composition fails, the tokens are returned to your balance automatically.
When it comes in handy
- Product presentation: the avatar narrates while slides and footage appear between its lines.
- Explainer video: the host's explanation alternates with illustrative frames.
- Promo from existing material: clips are edited into one video with the avatar's voiceover.
- Vertical series: the same script in 9:16 for social media.
- Regular content: one avatar and a proven scene structure — quick releases of new videos.
How it differs from the neighbouring tabs
“Avatars & generation” makes a single video from an avatar and text, “Video agent” assembles a clip from a text brief, HyperFrames renders an HTML animation, while Studio scenes is directing-style stitching: you decide which frames make the video, in what order, and what voices each scene.
How it pairs with other tabs
It is handy to keep the scene material in the Media library, voice text in the Text to speech tab or in your own voice in Voice cloning, then translate the finished video in Video translation and cut it into short fragments in Clip cutting.
FAQ
How many scenes can go into one video?
From one to fifty. Each scene is a complete frame of its own: a talking avatar, an image or a clip; the order can be rearranged.
How is Studio scenes different from “Avatars & generation”?
In “Avatars & generation” you get one video from an avatar, a photo and text. Studio scenes assembles a video from several independent scenes and lets you alternate a talking avatar, images and ready clips.
How is the price calculated?
The price is shown before launch: talking-avatar scenes and voiceovers for text scenes are billed per second, while silent images and clips are not charged separately. If the render fails, the tokens are returned to your balance.
Can I use my own videos, images and audio?
Yes. Images and clips are added by upload or link, and you can attach your own audio recording to an avatar scene and to an image instead of generated speech.