HyperFrames: rendering an HTML animation into video

HyperFrames is a tab in the Video avatars section that turns a prepared animation into a video file: you build a composition of frames, text and motion, hand it over as a zip or a link — and the section renders it into a finished video at the resolution, format and aspect ratio you choose. It is a way to produce clean intros, titles, animated slides and stings, and to overlay animation and captions on top of your own footage without a video editor. Below we cover what you can set, how to launch a render step by step and what it costs. The tool lives in the HyperFrames tab.
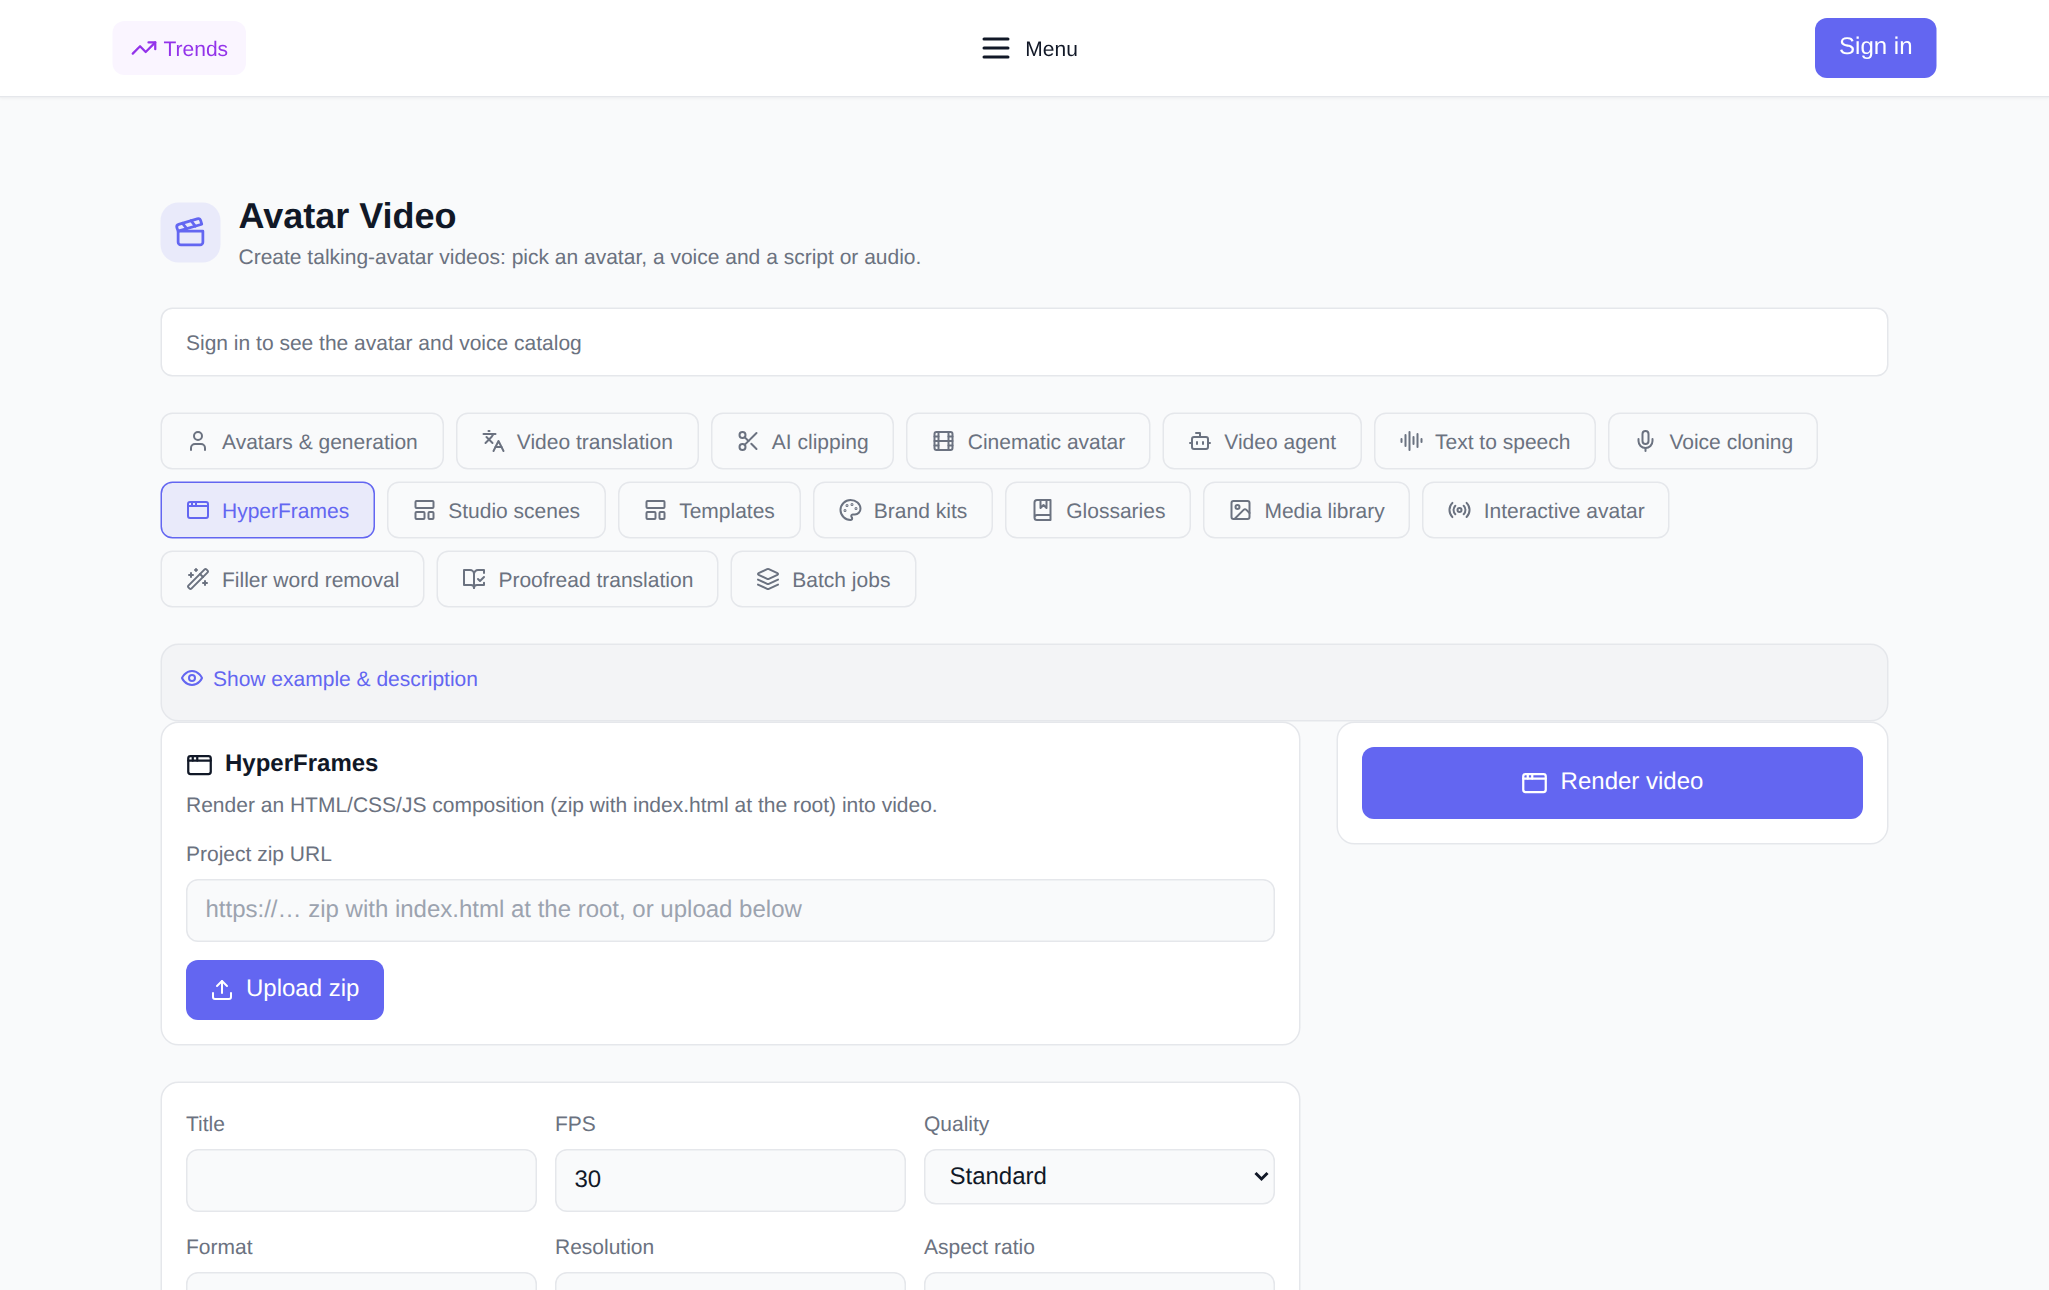
What HyperFrames does
HyperFrames takes a project composition and renders it into a video file. A composition is a set of pages and animation packed into a zip archive with index.html at its root. The section opens that entry point, plays the animation frame by frame and assembles a finished clip with the resolution, frame rate and format you specified. You are not limited to a single static frame: a composition can hold a sequence of scenes, motion, text reveals and transitions — all of it comes alive in the video. That is why the tool is handy when you need a designed clip rather than a talking avatar: a sting, slides, titles, or animation over your own frames.
What you can set before rendering
- Project zip URL — a public address of the archive with index.html at the root; or upload the archive with the “Upload zip” button.
- Title — the caption of the render in the history.
- FPS — frame rate, 30 by default.
- Quality — Draft, Standard or High.
- Format — MP4, WebM or MOV.
- Resolution — 720p, 1080p or 4K.
- Aspect ratio — 16:9, 9:16 or 1:1.
- Entry HTML — optional: a different file name instead of index.html, for example compositions/intro.html.
- Composition variables — optional JSON that injects values into the composition text, for example {"headline": "Hello"}.
How to launch a render: step by step
- Open the HyperFrames tab in the Video avatars section and sign in.
- Enter the project zip URL or press “Upload zip” — the archive is stored and substituted automatically.
- Type a title and, if needed, change FPS, quality, format, resolution and aspect ratio.
- If the entry point is not index.html, set the entry HTML; if the composition expects data, paste the variables JSON.
- Check the price in tokens: it is shown before launch.
- Press “Render video”. The render appears in the “My renders” block with a waiting status, and the card updates itself as it progresses.
- Once the clip is ready, it plays right in the card and downloads with one button.
When it comes in handy
- Intros and stings: a short animated header for a channel or clip.
- Titles and captions: text reveals, names, lower thirds.
- Animated slides: a presentation where every frame is its own scene with motion.
- Overlays on your material: animation, banners and captions on top of your images and videos.
- Vertical for social: the same project in 9:16 for Shorts, Reels and TikTok.
- Reusable template: build the composition once, then change the data via variables and render again.
How it differs from the other tabs
The “Avatars & generation”, “Cinematic avatar” and “Video agent” tabs make video from a person and text, while HyperFrames works with a ready-made design and animation: you decide what moves and how. It is closer to motion design than to a talking avatar. And if the render needs a voice, the finished clip is easy to voice in the neighbouring tabs and translate into other languages.
How it pairs with other tabs in the section
HyperFrames slots into a pipeline nicely. Voice the clip in the Text to speech tab or with your clone in Voice cloning, translate it in Video translation, and cut it into short fragments in Clip cutting. Colors, fonts and logo for the composition are best kept in brand kits, and ready assets in the Media library.
What a render costs
The platform is billed in tokens, with no subscription: new users receive starter tokens at sign-up, and the balance can then be topped up by any amount. The render price depends on resolution and frame rate and is shown in the interface before you press the button — what you see is what is charged. If the render fails, the tokens are returned to your balance. The finished file downloads from the card, and old renders can be deleted from the history.
FAQ
What is a zip project for HyperFrames?
It is an archive with your composition: markup, styles, scripts and animation, with index.html at the root. The section takes it by link or from an uploaded archive and renders it into a video file.
Do I need to know how to program?
A simple composition can be put together from a ready sample: an ordinary page with markup and animation is enough. The better you know layout and scripts, the more complex scenes you can build — but a basic clip of frames and text is within reach of a beginner.
What resolution and format is the video delivered in?
You choose: 720p, 1080p or 4K, an aspect ratio of 16:9, 9:16 or 1:1, and the format MP4, WebM or MOV. The finished file downloads from the render card.
What if the render fails?
The tokens are returned to your balance automatically. Check the archive: index.html must sit at the root, and every link to images and fonts must be reachable from outside; then start the render again.